Why You Need to Follow Up After Your Data Science Project
After completing a data science project, it’s tempting to just commit the code and consider it done. After all, with git, we have the code changes—that’s enough, right? I wish.
First-iteration code is messy, especially in the early stages of data science projects such as experiments and proof of concepts (POCs). This makes it difficult to replicate the 98.67% accuracy achieved, after putting it aside for a few months. Problems include:
- Dead-end code: We ran many experiments and had multiple dead-ends; they still exist in the code. After a few months, it’ll be difficult to separate the dead-ends from the working approach.
- Incorrect run sequence: Data science pipelines are strongly sequential; each step is dependent on the previous. Run them in a different order and we’ll get different results.
- Poor version control for
Jupyternotebooks: Data science prototypes are mostly done in Jupyter notebooks. Unfortunately, notebooks work poorly withgit. Rerunning the notebook leads to thousand-line differences and obscures the changes in code.
Version control for Jupyter notebooks
Jupyter notebooks are now an essential part of the data science experimentation workflow. Cell outputs (e.g., images, tables, logs, etc.) can be stored within notebooks and easily shared. Others can open the notebook and—without re-running it—view the code and results.
This is due to Jupyter notebooks being stored in json format with metadata, source code, formatted text, media, etc. Unfortunately, this doesn’t play well with git, which works best with plain text.
The cell outputs, which we love, can be annoying when using version control (e.g., git). While a small change in code will also change the output, the output change is more copious and distracts from the code change (in git diff). This makes it difficult to collaborate on notebooks.
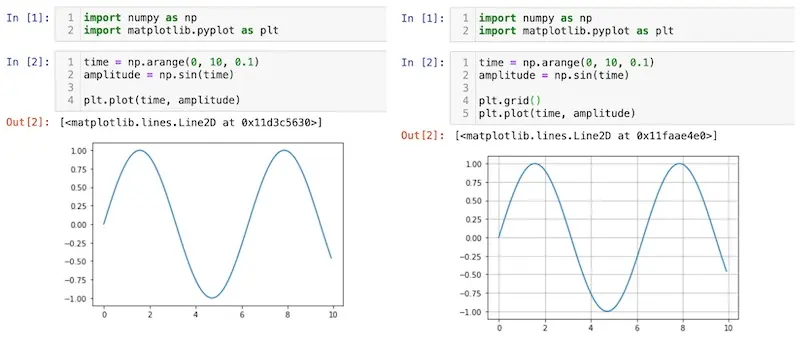
"Oh, I'm just changing one line of code to add gridlines. No biggie."
In the example above, we’re plotting the same sine curve, except we add gridlines on the right. It’s solely aesthetic and doesn’t affect the outcomes. However, when reviewing the pull request, we'll see the git diff below. And that’s from a single-line code change—this becomes unmanageable quickly.
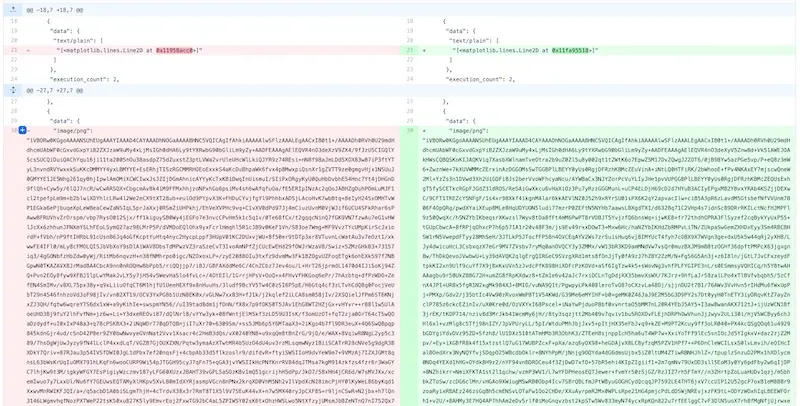
This is all from a single-line code change. Boggling, eh?
As a result, I developed a habit of converting Jupyter notebooks to .py at each milestone, doing some refactoring along the way. There’re also other tools such as nbdime, reviewNB, and jupytext to solve this problem.
Also, my friend Yi Xiang recently wrote a cool post about writing .py files and running them as pseudo-Jupyter notebooks on Docker. This is a another great way of getting round the version control problem.
There’s also missed opportunity from not following-up after a project is completed. Benefits of documenting and sharing your work include:
- Saving time (in the long run): Memory degrades fast and soon you won’t remember what you won’t remember. Your future self will thank you for the effort saved when trying to figure out the rationale, methodology, and results.
- Knowledge transfer: The team can continue work on the project in your absence (and you won’t be paged while having your vacation siesta in Granada).
- New ideas and collaboration: New ideas and collaboration opportunities arise on how to apply your work to other use cases (see 👉 below).
- Community engagement: The community learns from your experience (and mistakes). It helps with your team’s branding and recruitment efforts, as well as your personal profile.
It all started with a product classifier…
One of my first projects was to build a product classifier for an e-commerce platform. The goal was to automatically classify the hundreds of thousands of new products that were added daily.
An MVP (top-3 accuracy of 95%) was developed and put into production after a couple of months. I then spent some time building a simple user interface (similar to this) and wrote about it for our internal data science newsletter.
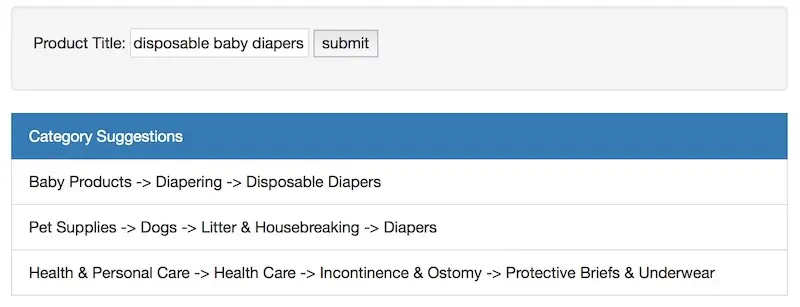
No one tried the curl commands. But when we shared the UI, our demo server crashed. 🤷♂️
We did not expect such a positive response. The search team sought to collaborate on a search-intent classifier: Given a search query, what are the most relevant product categories? The product reviews team wanted help on classifying product reviews: Which reviews should be approved? Which should be denied and for what reasons (e.g., profanity, personal details, spam, etc.)?
This lead to a virtuous cycle where we got more opportunities and work, earned more trust, and grew our contribution to the organization—all from a week’s effort of building a simple UI and writing a newsletter.
This is part three (after) of a three-part series on data science project practices. Also see part 1 (before) and part 2 (during).
Do These Practices Apply to Me?
This may not apply to you if:
- You work on data science projects in a single-threaded manner, from problem to research to solution, within a couple of months.
- You’re disciplined with refactoring and pruning your code, keeping it DRY.
- You consistently document your work (e.g., rationale, methodology, results, etc.) in a way that others can replicate the outcomes.
If you do the above, bravo! Go ahead and skip to the last step. Else, read on.
(Note: The following practices also apply to personal projects. In fact, personal projects benefit more as you’re not working in a team and getting feedback. It also furthers your learning from the project.)
Make Your Work Reproducible Each Run, Every Run
Remember the time when you revisited a project (from a few months back), ran the code, and got the same results again? Me neither.
Once, I had to pick up a project done by someone else (who had left the organization before I joined). Results from the project (i.e., machine learning metrics) had been presented and committed to the client—but I couldn’t #$^!@% replicate it. What ensued was days and weeks of figuring which permutation of notebooks to run in which magical order—no one should have to go through that.
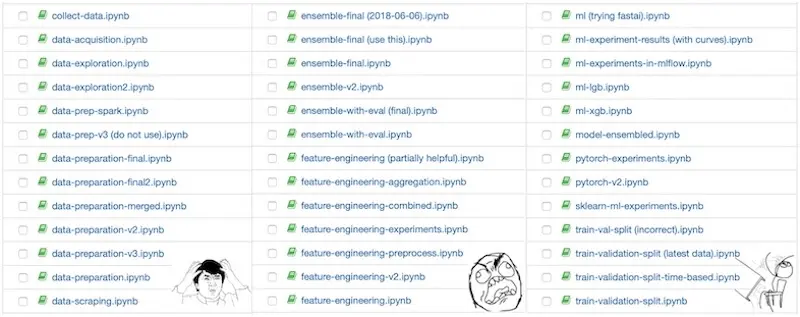
It's too easy to create Jupyter notebook copies, leading to notebook hell.
Thus, I made it a habit to package my projects, especially those in an unfinished state (i.e., not in production), so someone else can easily replicate the work. This doesn’t have to be complicated or take a lot of time.
“Always code as if the guy who ends up maintaining your code will be a violent psychopath who knows where you live” – John Woods
It starts with a script to replicate your code environment. I use a Makefile; running make setup will create the python virtual environment and install the required dependencies.
setup:
    python -m venv .venv && . .venv/bin/activate
    pip install --upgrade pip
    pip install -r requirements.dev
    pip install -r requirements.prod
Then, I have a script to run the code or notebooks end-to-end, in the right sequence (see 👉 below). One of the steps should include a train-validation split. A final step should evaluate and compare model metrics on the validation set—evaluation metrics should be identical every run.
(Note: While machine learning has a degree of stochasticity, fixing the seed should lead to reproducible results. Set the seed in processes involving shuffle (e.g., splitting data, cross-validation, iterative data loaders) and model training.)
If your pipeline can run on a single machine, create a docker image for it—this lets you spin up a fresh, clean environment with each run. (If not, run the pipeline on a spot instance cluster.) The docker container will set up the environment and run the scripts, throwing an error if the results are different.
Don’t forget to provide a README on how to run your pipeline and check the results. Have a team member or two verify reproducibility.
Reproducible POCs in Jupyter with Docker
We’ll need a few extra scripts to set up the Docker container to run our notebooks. First, a simple shell script that runs the notebooks in order. This should execute and update the notebooks with the output, letting us review the results at our convenience.
jupyter nbconvert --ExecutePreprocessor.timeout=-1 --execute --inplace --to notebook notebooks/1-data-prep.ipynb
jupyter nbconvert --ExecutePreprocessor.timeout=-1 --execute --inplace --to notebook notebooks/2-feature-engineering.ipynb
jupyter nbconvert --ExecutePreprocessor.timeout=-1 --execute --inplace --to notebook notebooks/2b-data-visualizations.ipynb
jupyter nbconvert --ExecutePreprocessor.timeout=-1 --execute --inplace --to notebook notebooks/3-train-val-split.ipynb
jupyter nbconvert --ExecutePreprocessor.timeout=-1 --execute --inplace --to notebook notebooks/4-train-model.ipynb
Then, a Dockerfile that builds our image with the required python dependencies. I use a simple requirements.txt here.
FROM python:3.8

LABEL maintainer='eugeneyan <[email protected]>'

WORKDIR /poc-docker-template

COPY ./requirements.txt /poc-docker-template/

# Install python requirements
RUN pip install -r requirements.txt
With these, building the Docker image and running the Jupyter notebooks end-to-end is simply:
# Build the container and tag it as 'poc-docker-template'
docker build --tag poc-docker-template .

# Run the container and the script 'run.sh'
docker run --rm -v $(PWD):/poc-docker-template --name tmp -t poc-docker-template /bin/bash run.sh
This mounts our local project directory on the container via -v $(PWD):/poc-docker-template. Thus, while our notebooks (in the project directory) are run in the container, updates will be reflected locally. Think of it as a (disposable) virtual environment that includes the operating system.
For more details, check out this GitHub repository. Try it for yourself.
Recall the scenario this section began with. Now, instead of spending days (and weeks) to replicate the previous results, we can do it in minutes and hours. Instead of starting with confusion, debugging, and unnecessary effort, we start with working code, reproducible outcomes, confidence, and ease of mind.
Document Everything, Especially What’s Not in Code
Working code and reproducible results are a must-have. However, this only captures part of the work—it doesn’t explain the business context, motivation, methodology, and (negative) experiment results.
Thus, documentation is important. I tend to write it like an industry conference / applied research paper. It should cover:
- Motivation: Why is the problem or opportunity important? What are the estimated benefits (e.g., improved customer experience, increase in revenue, cost savings)?
- Literature review: How have others attempted to solve this problem? What worked (and didn’t work)? How did these approaches guide our roadmap?
- Data: What is our data source? What schema does it have? What are its idiosyncrasies and deficiencies? Which time period did we use?
- Methodology: How did we clean the data and create features? What machine learning techniques did we try? What does the analysis (e.g., learning curves, trade-offs) tell us? How did we evaluate approaches (e.g., ML metrics, inference latency, resource constraints)?
- Results: What were the offline validation results? If A/B tests were conducted, what were the outcomes? What is our analysis and interpretation?
- Next steps: How can the existing implementation be improved? What ideas seem most promising with least effort?
“Documentation is like sex: when it is good, it is very, very good; and when it is bad, it is better than nothing.” – Dick Brandon
When writing documentation, I often find my understanding of the work lacking, especially on the methodology and results. When we conduct hundreds of experiments, it’s easy to forget or confuse certain details.
Thus, I have to revisit my work, dig into the details, and write it down. The sooner I do this, the better my memory, and the lesser effort needed. Imagine not having documentation and revisiting the work after a few months—many details would be lost forever.
The documentation (likely a word doc or wiki) can then be shared with the team for knowledge transfer and feedback. Together with the working code, someone else can pick up where you left off, increasing the bus factor of the project.
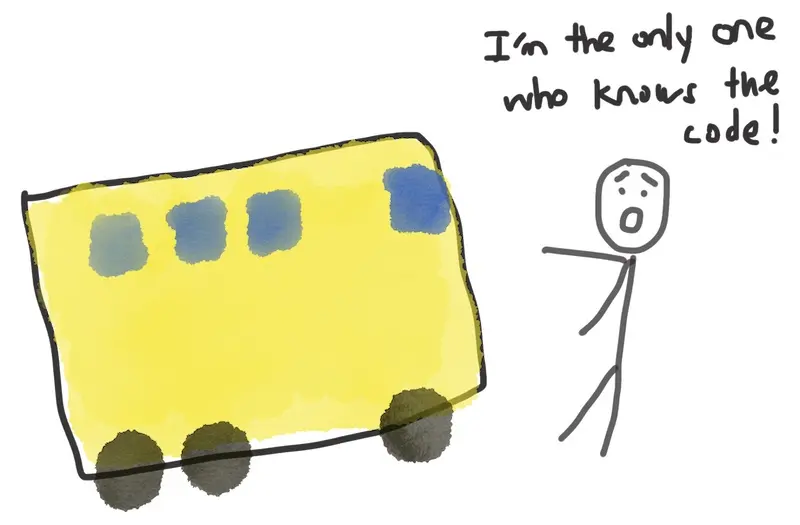
Don't be the person who wrote a ton of code and left.️
Don’t Keep Your Awesome Work to Yourself—Share It
It’s a pity to keep the work to yourself or your team. There are many venues you can share it, such as (internal) demos, conferences, meet-ups, and tech blogs (both work-related and personal).
It doesn’t take much more effort—just pick out the relevant sections from your documentation and tweak it to suit different audiences, such as:
- Internal stakeholders: They’ll have the business context and motivation and want to focus more on outcomes (read: 💰💰💰). Keep it light on the technical details. They’ll be asking: “How can this help me?”
- Practitioners: They’ll have the technical know-how and be interested in your research, methodology, implementation, and (failed) experiment outcomes. Feel free to dive deep into the details. They’ll be asking: “How can I replicate this?”
- Product and business leaders: They’ll be more interested in the high-level overview and focus on the use cases and outcomes. They’ll be asking: “How can I apply this to my product/organization?”
I’m always surprised by the benefits from sharing about the effort, both work-related and personal. Firstly, there’s immense satisfaction from sharing with the community, and they’re often appreciative. This helps the industry and community to learn from your experience and failures and level up.
Knowledge Shared = Knowledge Squared
Second, we get valuable feedback and suggestions for improvement. Furthermore, sharing our team’s awesome work helps with team branding and recruitment efforts. Many quality candidates reach out because they attended a meet-up, or heard good things about a meet-up. It also starts relationships with other organizations for knowledge sharing.
Last, it’s also a great way to build your presence and relationships with likeminded practitioners. I’ve made many friends through sharing my work online and at meet-ups. (If you’re thinking of giving a data science talk, here are seven tips to make it kick-ass).
These Practices Pay For Themselves Many Times Over
“Wow, that seems like a lot of effort”, you’re wondering.
Yes, these follow-up practices do take time (about a week or two, depending on the scale of the project). However, the long-term benefits far outweigh the effort—trust me on this and just try it once, please.
Upon the completion of your current project, arrange for time to follow-up. If you need to get buy-in, highlight the benefits: reproducibility, knowledge transfer, community engagement, team branding and recruitment.
Remember the time when you revisited a project (from a few months back), ran the code, and got the same results again?
— Eugene Yan (@eugeneyan) July 22, 2020
Me neither.
First-iteration code degrades too fast. Also, there's a lot to gain from sharing your work. Here's what worked for me👇 https://t.co/r8WpA7KXP1
Thanks to Yang Xinyi and Tyler Wince for reading drafts of this.
If you found this useful, please cite this write-up as:
Yan, Ziyou. (Jul 2020). Why You Need to Follow Up After Your Data Science Project. eugeneyan.com. https://eugeneyan.com/writing/why-you-need-to-follow-up-after-your-data-science-project/.
or
@article{yan2020follow,
  title   = {Why You Need to Follow Up After Your Data Science Project},
  author  = {Yan, Ziyou},
  journal = {eugeneyan.com},
  year    = {2020},
  month   = {Jul},
  url     = {https://eugeneyan.com/writing/why-you-need-to-follow-up-after-your-data-science-project/}
}
Share on:
Browse related tags: [ mechanism datascience productivity ] or
Join 11,800+ readers getting updates on machine learning, RecSys, LLMs, and engineering.